Followers

Wednesday, April 17, 2019

Replacing a Delta Bathroom Faucet Cartridge

     Plumbers are expensive.  That's why I decided to replace the cartridge in my leaky bathroom faucet.  I should say "faucets" because I discovered the beginnings of a leak in the faucet of the second sink while fixing the first sink.  I assembled my photo tutorial using pictures from both faucet repairs.  Don't be confused by the left/right switches.


Step 1
The problem was not water leaking out the spout.  The water was leaking from the bottom of the faucet handle.  Water dripping from the spout usually means that the cartridge is worn out.  Water escaping from the handle usually means springs, seats, and O rings need to be replaced.  I decided to replace the whole shebang since this faucet is 10 years old.

Step 2
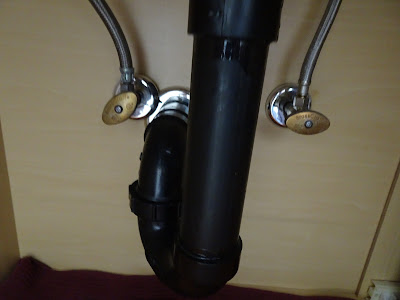
Gather an adjustable or channel lock wrench, needle nose pliers, an appropriately sized Allen wrench/hex key, and some old towels.  Then complete the most important step - turn off the water.  The shut off valves are under the sink.  Turn off both the hot and the cold sides.

Step 3
Faucet parts can be tiny, so it is important to close the drain stopper.  Your task will be oh so much harder if any parts go down the drain.  Once you have found the Allen wrench that fits, remove the set screw and pull off the faucet handle. 

You have exposed the cartridge and the nut that holds the cartridge down.

Step 4
Use the adjustable wrench or channel locks to remove the nut.  Turn counter clockwise.  It might be fused into place.  Add additional force gradually.

Step 5
Grab the cartridge with your needle nose pliers and pull it up and out.  Note the orientation of the cartridge, and sit it aside in the same position as it sat within the body of the faucet.  You'll see why this is important in Step 8.

Step 6
Use an old towel or rag to absorb any water in the hole.  Insert your finger, and you will find a round, plastic ridge in a well at the bottom of the hole.  This is the seat and there is a spring under this seat.  Use your needle nose pliers to grab the ring and seat and pull them out.

 Here is the old seat and spring.

Crusty Old Parts
Note the O ring on the cartridge.

Step 7
At this point, I used vinegar to remove the mineral deposits under the faucet handles.  They say not to use your finger nails as tools, but I scraped with my nails.  I didn't want to use a hard implement for scraping as that might have scratched the chrome.

Step 8
Cartridges come with a little plastic part that you insert.  Match the position of the plastic part in the new cartridge to the same part in the old cartridge.  The little plastic wedge controls the direction in which the handle turns (and I think whether hot or cold water comes out of the faucet) so you don't want to get this wrong..

Step 9
Place the spring inside the seat (wide end up and narrow end down).  Using the needle nose pliers, place the seat and spring in the well at the bottom of the hole.  You might have to apply some pressure with your finger to get these parts snuggley down into place.

Step 10
Drop in the new cartridge.  Note that the plastic tab on the cartridge must fit into the metal slot on the faucet body.  It might take a little pressure to push the cartridge down as far as it needs to go.

Step 11
Replace the nut tightening only with your fingers.  Once you have tightened it as far as it will go with your fingers, use the wrench to tighten just slightly more.  Tightening too much might damage the new O ring.  Now, replace the handle and tighten the set screw with the Allen wrench.  Turn on the water and check for leaks. 


     This repair cost $36.09.  Each cartridge cost $14.68.  A two pack of seats and springs cost $4.49.  Of course, there was sales tax.  You can get cheaper generic, plastic cartridges, but I decided to buy the brass parts sold at Lowe's that are designated as Delta replacement parts.

Monday, April 15, 2019

Eastern State Penitentiary

     Eastern State Penitentiary, located at 2027 Fairmount Avenue, Philadelphia, Pennsylvania, was operational from 1829 to 1971.  The property was abandoned through the 1980s while the city of Philadelphia considered various redevelopment plans.  The Eastern State Penitentiary Task Force successfully halted redevelopment in 1988, and the prison opened to the public for historic tours in 1994.  The prison is a U.S. National Historic Landmark, and it is open for tours every single day of the year from 10:00 a.m until 5:00 p.m.  I visited using a museum pass, one of many free passes available from the Burlington County Library.
     Eastern State was the first true penitentiary in the United States - a place where people were not  physically punished (whipping, for example), but where they were separated from society and from their fellow prisoners.  They served out their sentences in separate cells.  Prisoners didn't speak to each other.  They did not work together or take meals in a common dining room.  Silence was so important that guards wore socks over their shoes to muffle their footsteps.  This quiet, solitary existence, brainchild of reforming Quakers, was supposed to help offenders reflect, repent, and reform.  No one knows if the system worked because, during the years that the prison operated under this "Pennsylvania System" of separation, there was no record keeping concerning rates of recidivism.  Many people thought the Pennsylvania System merely traded physical tortures for mental tortures.       
   
This impressive wall is 30 feet high and extends another 10 feet below ground.  A neighborhood group tends the beautiful floral display in the front of the prison.

The original floor plan called for seven one story cell blocks radiating like spokes of a wheel from a circular hub.  Before the prison was halfway built, it was apparent that it would not be big enough.  The plans were altered to add a second story of cells on blocks four through seven.  As time went by, additional two story cell blocks were built in the spaces between the original seven until there were fifteen blocks.   

Cells are 8 feet wide and 12 feet long.  The tiny door in the back of the cell leads to an exercise yard.  

Each cell had a toilet and a cold water tap.  There was a rudimentary form of hot water radiant heating.  When the prison opened in 1829, even the White House didn't have indoor plumbing or central heating.  It turns out that having a toilet wasn't as luxurious as you might think.  All toilets flushed at the same time, twice per week, when a prison employee activated the central flushing system.      

Each cell had a skylight.

This cell has been restored to show how it would have looked for the average inmate.  Al Capone was incarcerated at Eastern State Penitentiary for seven months in 1929.  Prison officials allowed Capone to decorate his cell with luxurious furnishings, artwork, expensive rugs, and a radio.  Renovations of Capone's cell are not completed, so I didn't see it.  

Cell Block 4.

Sentences then were both harsher and more lenient than sentences now.  A first time offender might be sentenced to a two year term for stealing a small sum while a murderer got only 8-10 years.  There were no life sentences.  I suppose execution rather than incarceration was the way it went in the early 1800s. 

Each cell had a tiny exercise yard in the back, eight feet wide, like the cell.  Prisoners were allowed to garden and keep pets in their exercise yards.  

The Philadelphia skyline is visible over the walls.


Read more about it:


https://en.wikipedia.org/wiki/Eastern_State_Penitentiary

https://solitarywatch.org/2010/02/27/charles-dickens-on-solitary-confinement-immense-torture-and-agony/

https://www.easternstate.org/explore/exhibits/al-capones-cell

https://www.easternstate.org/press-room/press-releases/numbers-2017