Every time there is an Alexa commercial on the television, which contains people calling out to Alexa for one thing or another, my buddy Alexa wakes up. She isn't able to answer the TV folks. Maybe they talk too fast. After a sufficient wait, she goes back to sleep mode. I think I heard a sign the other night. It ain't easy being a smart speaker.
Sunday, December 23, 2018
Thursday, December 13, 2018
Drumthwacket
In September 2016, I visited Morven, the place that used to be the New Jersey governor's mansion. Visiting Morven made me want to visit Drumthwacket, the current governor's mansion. Christmas time is the best time to go because the mansion is decked out for the holidays, courtesy of several New Jersey garden clubs. This nice NJTV news video provides the basic history of the house and allows you to see the inside. This video from 2014 shows the mansion partially decorated for the holidays. These decorations are nice, but 2018's festooning was over-the-top.
Drumthwacket is called the people's home, and visiting is free. All guests in your party have to register, I suppose for security reasons. Five first floor rooms are open to the public. Photographs are prohibited inside, but you can wander the grounds and take as many outside pictures as you like.
Use the Drumthwacket website to register for your tour: https://drumthwacket.org/
And yes, Game of Thrones fans, once you have visited Drumthwacket, you are permitted to call yourself a Drumthwaki.
Drumthwacket is called the people's home, and visiting is free. All guests in your party have to register, I suppose for security reasons. Five first floor rooms are open to the public. Photographs are prohibited inside, but you can wander the grounds and take as many outside pictures as you like.
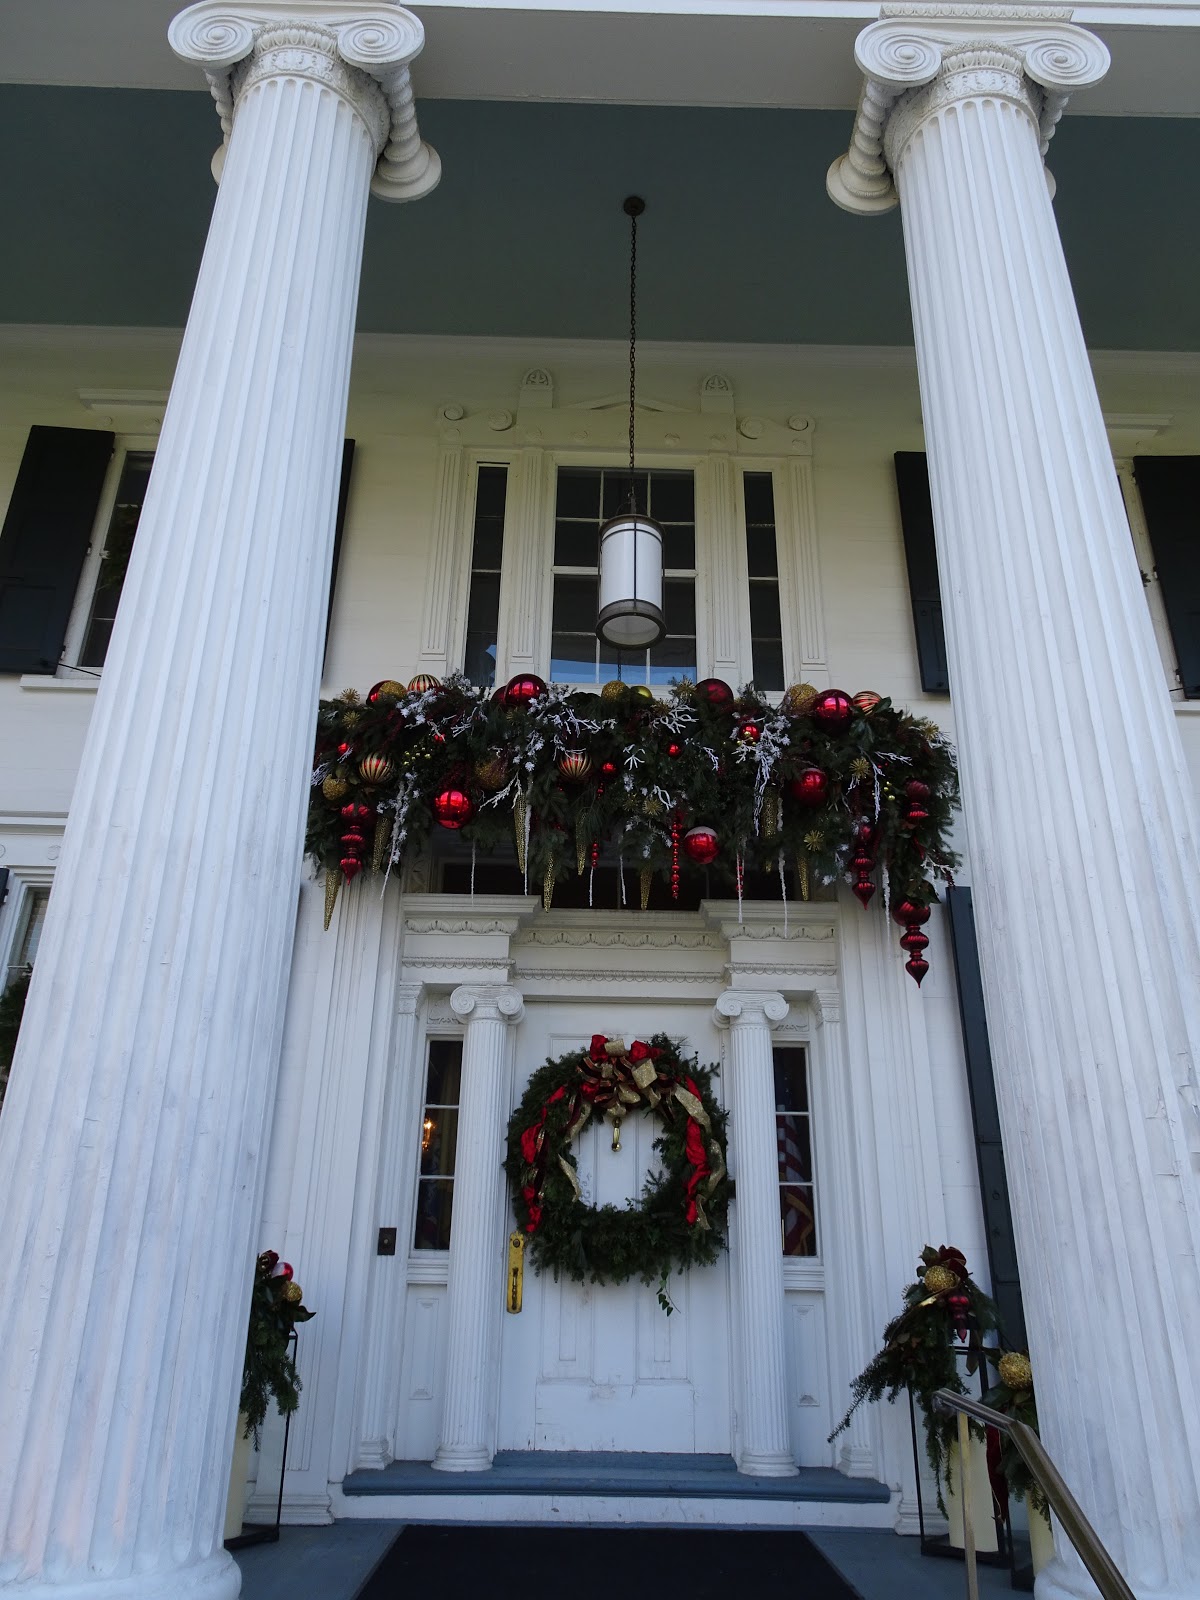 |
| Welcome |
 |
| It was a bit of a bad hair day! |
 |
| This bust of Julius Ceasar is bundled up since it stands guard in a drafty doorway. One of the decorators has a sense of humor. |
 |
| The panes of glass glitter like diamonds. |
 |
| If you can't take a picture from inside, then take a picture through the glass from outside. This sun porch was decorated in a Hanukkah theme. |
 |
| Could this be our governor catching a nap? Seward Johnson is the artist. |
 |
| This is the frog pond. I don't know if real, live amphibians reside here, but there are two cement frogs in the pond. A water fountain spouts up in the center during warm weather. The pond had a mini restoration in 2009. Here's a link to a video of that project, if you are interested: https://www.youtube.com/watch?v=VSg75V-HRCo |
 |
| A stream runs across the back of the property. |
 |
| These American Sycamore trees (also called Buttonwood or American Planetree) have beautiful, white bark. |
 |
| This is the fire pond. Large properties that are located a distance from water mains have ponds that can be pumped in case of fire. And you thought it was just for looks. |
Use the Drumthwacket website to register for your tour: https://drumthwacket.org/
And yes, Game of Thrones fans, once you have visited Drumthwacket, you are permitted to call yourself a Drumthwaki.
Sunday, December 9, 2018
I Need An Afghan - Fast!
I had taken some time off from the Southern New Jersey Crochet Guild, so when I went back to the evening meeting on November 23, 2018, I felt a little pressured when I found out that I would have to finish two projects in about three weeks. It wasn't a requirement. Nobody said I HAD to do it. The pressure came from within. I felt like I should do it, this being the Christmas season, and all that.
The bigger of the two assignments was to produce an afghan for a local church. The church would be taking these warm blankets to people in need. If you are trying to stay warm in the winter, you don't want a holey, lacy afghan. You need a tightly crocheted afghan. It takes a lot longer to crochet a tightly stitched afghan. Here's how I solved the problem:
I didn't think this out ahead of time. I just jumped in. I had to make a few adjustments due to my lack of forethought, but it turned out okay in the end. Here are some instructions with my boo-boos corrected:
Chain (ch) a multiple of 3. I used a J hook. To make the above afghan, ch 147.
Rows 1-4: In the second ch from the hook work a single crochet (sc). Sc down the chain for a total of 146 sc, then ch 1 and turn. Repeat for 3 more rows for a total of 4 rows of sc. Remember to ch 1 before turning at then end of every row.
Row 5: Beginning in the second stitch (st) from the hook, ch 2. Work puff stitch in the third st from the hook as follows: yarn over (yo), insert hook in that third st, draw yarn through the st, yo and draw the yarn through 2 loops on the hook. You have made a partial st and you have 2 st remaining on your hook. *Yo, insert the hook in the same place, draw the yarn through the st and yo. Draw the yarn through only the first 2 loops* on the hook. Now you have a partial st and 3 loops on the hook. Repeat from * to * until you have 6 loops on the hook. Then yo and draw the yarn through all 6 loops. That's your puff st.
Sc in the next 2 st. Make a puff st in the next st. Repeat 2 sc, puff st down the row until you have 49 puffs. There will be 2 st remaining. Sc 2, ch 1 and turn.
Rows 6-20: Work all rows in sc.
Row 21: Repeat Row 5.
Rows 22-40: Work all rows in sc.
Row 41: Repeat Row 5.
Rows 42-60: Work all rows in sc.
Row 61: Repeat Row 5.
Rows 62-70: Work all rows in sc.
Row 71: Repeat Row 5.
Rows 72-95: Work all rows in sc.
Row 96: Repeat Row 5.
Rows 97-115: Work all rows in sc.
Row 116: Repeat Row 5.
Rows 117-131: Work all rows in sc.
Row 132: Repeat Row 5.
Rows 133-136: Work all rows in sc.
Border: At the end of Row 136, in the corner, ch 1 and turn. Sc all the way around the four sides of the afghan. I made a ch to turn at corners 1, 2, and 3. When I reached the 4th corner, the place where I started, I made 2 ch. Call this Round 1.
Round 2: Half double crochet (hdc) all the way around. Ch 2 at the corners. I had one corner that bulged out, so I made only 1 ch before continuing on with hdc (winging it!). Ch 1 at the end of the round.
Round 3: Sc all the way around as you did in Round 1.
Scalloped Edge Also Called Shell Stitch Border: Here's a nice video to explain the technique.
I had to fudge the corners of the edging a little bit since I didn't work the count out ahead of time. The adjustments were not noticeable in the finished project.
This design worked because single crochet is a tight stitch that you can work up fast. The large J hook built the afghan quickly. The puff stitch bulks up the project and adds a lot of interest. I added the edge and scallop because my afghan was not quite big enough. You can easily enlarge this afghan by beginning with a longer starting chain, maybe 174 ch. Add more rows of sc to make the blanket wider, maybe 10-12 extra rows of sc on either side of the center band of 9 rows of sc. If you enlarge the afghan, I suggest finishing it off with only one row of sc around the edge followed by the scallop.
Our second project was to make little Christmas stockings. They will be used as "tray favors," stuffed with candy and placed on the trays of children who are patients at Shriners Hospital. Here are the instructions:
http://www.eatingoutloud.com/2011/12/granny-square-stocking-ornament-crochet-pattern.html
If you would like to crochet for a good cause, the guild meets at the Burlington County Library Headquarters Branch on the second Tuesday of the month from 1 p.m. to 3 p.m. and on the fourth Wednesday of the month from 6 p.m. to 8 p.m. All skill levels are welcome. If you have no crochet skills and want to learn, we will teach you.
The bigger of the two assignments was to produce an afghan for a local church. The church would be taking these warm blankets to people in need. If you are trying to stay warm in the winter, you don't want a holey, lacy afghan. You need a tightly crocheted afghan. It takes a lot longer to crochet a tightly stitched afghan. Here's how I solved the problem:
 |
| I made it up as I went along. When I decided I was at the mid-point, I repeated to make a mirror image. |
 |
| You can see that the stitches are single crochet, half double crochet, puff stitch (I have also heard this stitch called a bobble stitch), and shell stitch. |
I didn't think this out ahead of time. I just jumped in. I had to make a few adjustments due to my lack of forethought, but it turned out okay in the end. Here are some instructions with my boo-boos corrected:
Chain (ch) a multiple of 3. I used a J hook. To make the above afghan, ch 147.
Rows 1-4: In the second ch from the hook work a single crochet (sc). Sc down the chain for a total of 146 sc, then ch 1 and turn. Repeat for 3 more rows for a total of 4 rows of sc. Remember to ch 1 before turning at then end of every row.
Row 5: Beginning in the second stitch (st) from the hook, ch 2. Work puff stitch in the third st from the hook as follows: yarn over (yo), insert hook in that third st, draw yarn through the st, yo and draw the yarn through 2 loops on the hook. You have made a partial st and you have 2 st remaining on your hook. *Yo, insert the hook in the same place, draw the yarn through the st and yo. Draw the yarn through only the first 2 loops* on the hook. Now you have a partial st and 3 loops on the hook. Repeat from * to * until you have 6 loops on the hook. Then yo and draw the yarn through all 6 loops. That's your puff st.
Sc in the next 2 st. Make a puff st in the next st. Repeat 2 sc, puff st down the row until you have 49 puffs. There will be 2 st remaining. Sc 2, ch 1 and turn.
Rows 6-20: Work all rows in sc.
Row 21: Repeat Row 5.
Rows 22-40: Work all rows in sc.
Row 41: Repeat Row 5.
Rows 42-60: Work all rows in sc.
Row 61: Repeat Row 5.
Rows 62-70: Work all rows in sc.
Row 71: Repeat Row 5.
Rows 72-95: Work all rows in sc.
Row 96: Repeat Row 5.
Rows 97-115: Work all rows in sc.
Row 116: Repeat Row 5.
Rows 117-131: Work all rows in sc.
Row 132: Repeat Row 5.
Rows 133-136: Work all rows in sc.
Border: At the end of Row 136, in the corner, ch 1 and turn. Sc all the way around the four sides of the afghan. I made a ch to turn at corners 1, 2, and 3. When I reached the 4th corner, the place where I started, I made 2 ch. Call this Round 1.
Round 2: Half double crochet (hdc) all the way around. Ch 2 at the corners. I had one corner that bulged out, so I made only 1 ch before continuing on with hdc (winging it!). Ch 1 at the end of the round.
Round 3: Sc all the way around as you did in Round 1.
Scalloped Edge Also Called Shell Stitch Border: Here's a nice video to explain the technique.
I had to fudge the corners of the edging a little bit since I didn't work the count out ahead of time. The adjustments were not noticeable in the finished project.
This design worked because single crochet is a tight stitch that you can work up fast. The large J hook built the afghan quickly. The puff stitch bulks up the project and adds a lot of interest. I added the edge and scallop because my afghan was not quite big enough. You can easily enlarge this afghan by beginning with a longer starting chain, maybe 174 ch. Add more rows of sc to make the blanket wider, maybe 10-12 extra rows of sc on either side of the center band of 9 rows of sc. If you enlarge the afghan, I suggest finishing it off with only one row of sc around the edge followed by the scallop.
Our second project was to make little Christmas stockings. They will be used as "tray favors," stuffed with candy and placed on the trays of children who are patients at Shriners Hospital. Here are the instructions:
http://www.eatingoutloud.com/2011/12/granny-square-stocking-ornament-crochet-pattern.html
If you would like to crochet for a good cause, the guild meets at the Burlington County Library Headquarters Branch on the second Tuesday of the month from 1 p.m. to 3 p.m. and on the fourth Wednesday of the month from 6 p.m. to 8 p.m. All skill levels are welcome. If you have no crochet skills and want to learn, we will teach you.
Wednesday, November 14, 2018
A Suggestion
I have a suggestion for Chip, Joanna, and the Discovery people. I happened upon some gardening videos produced by Jessica Sowards. I think she should be the star of a gardening show. I wasn't wild about the home schooling and the churchy stuff, but the lady knows tomatoes.
Tuesday, November 13, 2018
What the What?!
So, Chip and Jo-Jo left their "Fixer Upper" gig on HGTV because they couldn't balance the demands of family, their business, and being stars of a TV series. And now they are going to have their OWN (no pun intended) NETWORK?? Again I say, what the what?!
If you are impatient with Chip's shenanigans, fast forward to the four minute mark to get to the point of this video.
If you are impatient with Chip's shenanigans, fast forward to the four minute mark to get to the point of this video.
Thursday, November 8, 2018
Edwin B. Forsythe National Wildlife Refuge
Taking a drive through the Edwin B. Forsythe National Wildlife Refuge is a great cold day activity. It is not necessary to leave your car, but there are plenty of spots to pull over if you want to get out of the car to take pictures or stretch your legs. There are also some walking trails that branch off from the main road. The admission fee is $4.00 per car for private vehicles and $2.00 per bicyclist or walker. You can use a National Parks Pass to get in for free. I visited the Brigantine Division of the refuge which is located along the Mullica River about 10 miles north of Atlantic City.
 |
| There were several species of ducks. That's Atlantic City in the background. |
 |
| There were many, many egrets in the shallow water. |
 |
| There were also lots of swans. |
 |
| This guy is a Great Blue Heron. |
 |
| And these specimens are known as serious bird photographers. |
 |
| Whose foot prints are these? |
 |
| More Ducks |
 |
| Bottoms Up! What a way to get lunch. |
 |
| Coming In for a Landing |
 |
| Splash Down |
 |
| What a fun day. |
Wednesday, November 7, 2018
Dog Quilts
I think it's cute to see Mardi rolled into a ball. Why do dogs do that? A quick google tells me that they are conserving body heat. Is my doggie cold? If so, I could turn up the heat ... or, I could make her a blanket.
Joann Fabric just had a sale on decorator cottons. These 100% cotton fabrics are a sturdy medium weight, and they are washable. Since I had a coupon which gave me a discount in addition to the sale price, I couldn't resist making a couple of canine quilts.
The process was simple:
Materials:
1½ yards of 45" fabric for the front
1½ yards of a coordinating 45" fabric for the back
½ yard of another coordinating 45" fabric for the quilt binding
Polyester quilt batting
Thread (I used quilting thread because I had another coupon for 50% off notions)
If you don't feel artistic, you can skip trying to find three coordinating fabrics. Just purchase 3½ yards of the same print. If you don't have quilting thread, use any good quality cotton thread.
Method:
I washed, dried, and ironed the fabric. I always pre-shrink before cutting.
Trim the cut ends of one print so that you have nice rectangles with sharp 45° corners. Lay this piece of fabric on top of the coordinating fabric and trim so that both pieces are the same size. There is usually always some variation due to a possible cutting difference at the store or the shrinkage rates of the different fabrics. Cut a piece of batting that is slightly bigger than the fabric. Make a sandwich of backing fabric (right side face down), batting, and top fabric (right side face up). Smooth the layers and use quilt pins (AKA extra long straight pins) to pin all the layers together. Use lots of pins starting in the middle and moving out to the edges. Then you can hand baste the layers together, but I skipped this step and went straight to machine quilting the layers together, removing the pins as I sewed. In both cases, my quilt backing print was geometric, so I followed these lines as I machine quilted. After machine quilting, I trimmed away the excess batting and attached the binding.
Binding: I cut the ½ yard piece of fabric into 3" strips, then sewed the strips together. Here's an excellent video that demonstrates how to join the strips and attach the binding with an invisible join.
https://youtu.be/2egganTi2us
Mardi seems to like her new blankets.
 |
| I machine quilted by sewing down the center of the white diagonal lines. |
 |
| Mardi occasionally likes to snooze in this dog house. |
 |
| Kismet. I found a dog print! |
 |
| If you sew it, they will burrow into it. |
Friday, November 2, 2018
Hainesport Women Vote
The women in my family vote. We might not be able to predict what we will be doing on the other 364 days of the year, but on the first Tuesday in November, we will go to the polls.
I was born in 1953. I cast my first vote in November of 1971. I was eighteen and able to vote because the United States Senate and the House of Representatives passed the Twenty-sixth Amendment to the United States Constitution in March of 1971. I was a first semester college freshman living on campus in New Brunswick. I decided there would be no absentee ballot for me. We didn't have classes on election day, so I walked out to Route 18 and caught a bus into the Port Authority in New York City. From there, I took another bus to Westampton. My father picked me up, took me to my polling place in Hainesport, and I cast my first vote.
My mother was born in Hainesport in 1923. She was twenty-one years old in November of 1944 when she first voted. She cast her last ballot in November 2000. That year she voted by absentee ballot from her bed at the Virtua Rehabilitation Center. Even terminal cancer couldn't keep her from voting.
My grandmother was born in Hainesport in 1893. Women didn't have the right to vote in 1893. My grandmother participated in her first election in November 1920 after the August 1920 passage of the Nineteenth Amendment to the United States Constitution which guaranteed all women the right to vote. On that election day, she was twenty-six years old, had been married for three years, and was expecting her first child. She cast her last vote in November of 1976.
Male or female, if you are age eighteen, you should register and you should vote. Cherish your right to vote. Exercise your right to vote.
Thursday, September 6, 2018
Container Gardening - Part 2
What a container garden needs first and foremost is containers. I have some larger terracotta flower pots, but nothing big enough to grow tomatoes or corn. Having to purchase containers would set me back quite a bit, so I turned to freecycle.org. I registered and joined several nearby communities. I posted "wanted" notices for storage bins (for planting or composting), extra large planters, and shelving. Thanks to all the freecyclers who gave me such good stuff.
 |
| These are two of four bins that I got. |
 |
| I drilled drainage holes, necessary for planting or using as a composting container. |
 |
| I started composting grass clippings, twigs, vegetable scraps, egg shells, coffee and coffee filters. I found a local place where I can get free horse manure. None of my bins came with lids. For now, I am using an old piece of hardware cloth weighted down with a board (to keep critters out). I put the word out on freecycle for old window screens, but I haven't gotten responses to that request. No, composting doesn't smell. |
 |
| These pots are from Lowe's. Lowe's and Home Depot are not a good source for pots because they recycle their pots by returning them to the suppliers. I got lucky the day I asked for these. Smaller pots like these are good for lettuce. |
 |
| The shelving came from a person who was downsizing to a smaller home. All of the pots in this picture came from another person who is also downsizing. Because I have collected these items from various communities, I will wash and disinfect them before I plant in them. |
I'll continue with Part 3 when I buy my seeds and start my seedlings in March or April 2019.
Tuesday, September 4, 2018
Container Gardening - Part 1
I have an area in the back yard that is covered with a thick layer of 1½ inch river rock. The picnic table that used to sit on this spot was chewed by squirrels and warped by the elements. One night my neighbor, with my blessing, used the table to fuel an impressive bonfire.
That left me with an empty spot. What to do, what to do? I decided that next spring I will set up a container vegetable garden.
This project has its challenges. My stony plot is outside of the fenced section of the back yard. That means the deer, ground hogs, and rabbits will ruin it. I'll need a fence. It would be Pinterest perfect to match the garden fence to my black aluminum backyard fence, but that costs $500 - $1000 depending on if I buy used fencing or brand new materials. This price includes professional installation since I don't have the skill or the tools for properly installing a metal fence. My barrier has to be cheaper. It doesn't make a lot of sense to spend beaucoup bucks on an enclosure for the amount of vegetables that I will produce. Finding cheaper, yet eye pleasing materials, and doing it myself would bring the price down, but the work would have to be easy. I'm not as fit as I used to be and a pressure treated 4x4x8 is a bit too heavy for me to tote around in my senectitude.
Here's my solution: Going rustic, using wood and wire, will blend nicely in the back yard. Landscape timbers are lighter weight and fairly cheap. They have a reputation for rotting quickly, but I have a workaround for that. My garden enclosure is going to cost less than $150.00. If it lasts five years, I'll be thrilled.
 |
| My Stony Plot The backyard fence will serve as one side of my garden fence. |
 |
| This is a roll of 14 gauge welded wire. It is 60" tall. The backyard fence is 54" tall, and a deer has never jumped over it. I think a 60" fence will deer proof my garden. |
 |
| These are the much maligned landscape timbers. I'll be using ten pieces - eight for the fence and two for the gate. I bought one extra post in case something goes wrong. Of course, when you have it, you never need it. |
 |
| Some say that painting posts with roofing tar will preserve the part that is buried below ground. I'm hoping this low cost treatment will extend the life of my posts. The tar had settled and had to be stirred a lot. Wear old clothes because you will have to throw out anything splattered with tar. You'll also thrown out your paint brush. |
 |
| Paint the sides, but not the bottom. Supposedly, moisture will drain down and out of the wood. Coating the bottom would make a sealed cup that traps moisture. I applied a super thick layer of tar. It was almost dry 24-36 hours later. It was completely dry within a few days. I thought the tar was really going to stink, but it was fairly low odor. |
 |
| OMG. It took forever to dig the holes. I raked the stones out of the way and used a post hole digger. Holes should be three feet deep. The first foot was a snap. I encountered roots in the second and third feet of my excavation. The post tarring tutorial that I viewed advised that the tar should go up the post a few inches above ground level. I didn't use concrete to set the posts. They are sitting on a few inches of sand and rock. The sides of the holes are also filled in with sand and stones. |
 |
| I used 1-1/4" fencing staples to attach the wire to the posts. I cut two lengths of wire. Each piece goes down one side and wraps around the front. The top of the wire is not perfectly level along the full run. I was more concerned about having it meet the ground all the way around, to discourage rabbits. The wire also is not stretched taut. It's only has good as one old lady can make it. I made the gate by ripping two landscape timbers in half lengthwise (Thank you, cousin Tom). The three cross pieces are attached by drilling through the sides with 4.5" flat head structural wood screws. The fencing is attached to the gate frame with 3/4" poultry staples. Since the gate is light weight, I used three of the cheapest galvanized hinges that I could find. One hook and eye is good enough for keeping the gate closed. |
Monday, August 20, 2018
Silicone Drink Covers
I find that I am inclined to drink much more water if there is always a full glass sitting on the kitchen island. The thought of stray particles or worse yet, a fly, getting into my glass really skeeves me. My solution has been to put a sandwich bag over my drink.
 |
| Effective, but not pretty. |
 |
| I found these at a gift shop. They are silicone drink covers, and they come in a two pack. |
 |
| Since they were selling for a special price of "buy one, get one 50% off," I bought pink flowers for me and yellow flowers for a friend. |
 |
| As you can see, the suction is pretty strong; however, I don't recommend doing this trick with liquid in your glass. These lids don't stop a fly from walking around the outside rim of the glass, but they are really pretty, so I am going to put that thought out of my mind. |
Tuesday, July 24, 2018
On the Fence
There are a lot of chickens in my neighborhood. The young people who have recently moved in like to keep chickens. I like the birds because they remind me of my childhood. I enjoy weeding in my front yard because I can hear the chickens clucking across the street. It's a soothing sound.
There's also a small flock up the street. Early one morning, I spied all but one of them lined up, perched atop the fence. I didn't know chickens liked to sit on fence rails. I found out that chickens like to roost at night on perches. In fact, they need a place to roost. They sleep off the ground where they are safe from predators. Following the pecking order, the head hen gets the highest (safest) spot. Members of the flock with less status sleep lower. If they sleep in a row with the Queen of Clucking, subordinates have to take the outside edges and serve as look-outs. Chickens' eyes are on opposite sides of their heads. When a look-out's eye gets fatigued, they do an about face, using a fresh eye for guarding the flock, giving the original eye a rest. If chickens sleep sitting on the ground or the hen house floor, they are vulnerable to foot infections from bacteria and parasites. Sometimes rats and mice might even nibble their toes. Chickens will spread out in warm weather, but they huddle together for warmth during the winter. Perching on a metal fence is fine in the summer, but metal perches will cause frost bitten feet in the winter. Some say the best perch is the 4" side of a wooden 2" X 4" board. Hens can sit flat footed (their favorite stance) on the 4" surface, and they can transfer some of their weight from their feet to their keel-bone. Their feet will not freeze to a wooden surface. Plastic perching surfaces (like plastic pipe) are bad because they are slippery.
If you want to comply with the latest research concerning your chicken's perch, you can measure their feet and make customized perches that will be most comfortable for them. Custom perches should be flat with rounded edges. Supposedly, the best perches are wrapped with something washable that provides some cushioning, like a split open bicycle inner tube.
One last thing: Chickens poop in their sleep. Their perches should not be located above their nesting boxes or their food and water supplies.
 |
| On the Fence They are not planning the great egg-scape. They are just doing what chickens do. |
Friday, June 15, 2018
Deer Repellent
The deer, or maybe it's the chipmunks, are eating my flowers and the tender new growth on my shrubbery. I tried hanging human hair and dog hair around the feeding ground. I also sprinkled dog poop and (I am embarrassed to reveal ) human urine around my most nibbled flower bed. Nothing worked.
I know someone who swears by coyote urine. You can get an 8 ounce bottle of the stinky stuff at the Home Depot for $13.58. I thought I would end up spending a fortune considering that the product would have to be reapplied frequently with all the rain we have been having.
A friend gave me a recipe for homemade deer repellant that is made from garlic and hot peppers. She says it is cheap and it works. Here's the recipe:
One clove of garlic
One hot pepper (I bought a serrano pepper, the hottest one in the Shop Rite produce aisle.)
One pint of water
One drop of dish soap - add just before bottling
One drop of cooking oil -add just before bottling.
My instructions were to blend the garlic, pepper and water, then strain through a coffee filter (or two) to remove all the pulpy particles. Pulp will clog up a spray bottle or garden sprayer, so it is important to strain out every bit of it.
Here's where this project went off the rails. I thought the juice might be more potent if I boiled the garlic and pepper in the 16 ounces of water before I tossed it in the blender. Of course I cut up the pepper before cooking. Naturally, I rubbed my nose while I waited for my witches' brew to boil for five or six minutes. It wasn't long before the tingling started. Still, I was undeterred. I pulled the covered pot off the burner and lifted the lid. I should have worn a respirator. I coughed. I sputtered. My eyes watered and snot poured out of my nose. The fumes were unbelievable.
After the liquid cooled a bit, I pulsed it in the blender and strained it. Then I thoroughly washed every part of my blender imagining the kick my next frozen margarita would have if I didn't get every nook and cranny clean. As I cleaned up the kitchen counters, I made a mental note that my dish cloth and towels should be washed separately, not with pillow cases, wash clothes, underware, or any items that might touch a sensitive body part. Maybe I'm going a little overboard, but you can't be too careful.
I'm pretty sure this stuff is going to work.
Thursday, June 14, 2018
Dream Big, Start Small
My friend recently mentioned in one of her emails that she has yet to find her passion. I'm the same. I like lots of stuff, but there is nothing in this world that I love so much that I have been driven to pursue it like my life depended on it. As a result, I am a dabbler - Jill of all trades, mistress of none.
Curiosity is my most pronounced character trait. I saw a woman walking a pig in Long Bridge Park. I marched up to her and started interviewing like I was writing an article for the Burlington County Times. Did she like having a pig for a pet? Do pigs enjoy walking on a leash? How old was her pig? Could I touch her pig? Another time I heard a rumble and the house shook. Since it happened only once, I knew the trembling wasn't caused by soldiers playing war games at McGuire Air Force Base. The TV news didn't report an earthquake. I googled like crazy for a couple of days until I discovered that there was an enormous sonic boom near Galloway, New Jersey that jiggled the southern half of our state.
If I have something close to a passion, it is that I love to read. Combine a love of reading and a nosy nature and you get a person who is pretty good at researching and figuring things out. I often find that answering one query just leads to more questions. Once I clicked so many blue highlighted words in a Wikipedia article about quinoa that I ended up learning the biological definition of lumen - the inside of a tubular space, like the inside of a vein or an intestine.
I think that Wikipedia is a great place to start if you want to know something. Some people say it contains too much inaccurate information, but I still like Wikipedia.
One night I was watching a TV news magazine and I saw a segment about a gathering of Wikipedia editors. Anybody in the whole, wide world can be a Wikipedia contributor/editor. Anybody = Me. I mulled this idea over for about three years. A few months ago I created an account and a few days ago I made my first contribution. I was watching Season 3, Episode 10 of the TV series "Billions," and I noticed the name Patti D'Arbanville in the credits. I recognized the name from the 1989 TV series, "Wiseguy." I remember way too much about the "Wiseguy" series because, though Chris Noth had not yet become Carrie Bradshaw's Mr. Big, I fantasized at the time that he could be mine. I immediately looked up Patti on Wikipedia, and I noticed that her appearance on two episodes of "Billions" had gone unmentioned among her Wikipedia TV credits. I checked out the official "Billions" series site through Showtime network. I also went to IMDb (the Internet Movie Database) to verify all of Ms. D'Arbanville's "Billions" appearances. Then I added the "Billions" information to the the Wikipedia article.
Once I actually edited an article, I began to wonder about my fellow editors. Who are they? Well, they are mostly men. In 2011, only 9% of global editors were women and 15% of editors in the United States were female. Wikipedia hoped to increase its number of female contributors to 25% by 2015, but that didn't happen. Less than 5% of women have 500 or more edits to their names.
Dream big. Five hundred edits. Four hundred ninety nine to go.
http://newyork.cbslocal.com/2016/01/28/south-jersey-sonic-boom/
https://en.wikipedia.org/wiki/Quinoa
https://en.wikipedia.org/wiki/Kashrut
https://en.wikipedia.org/wiki/Lumen_(anatomy)
https://hbr.org/2016/06/why-do-so-few-women-edit-wikipedia
https://www.newyorker.com/tech/elements/a-feminist-edit-a-thon-seeks-to-reshape-wikipedia
https://en.wikipedia.org/wiki/Patti_D%27Arbanville
Monday, June 11, 2018
Mill Hill Garden Tour
Mill Hill is a gentrified section of downtown Trenton, New Jersey. The area got its name from Mahlon Stacy's mill located on the Assunpink Creek. Stacy's mill, built in 1679, was the first industrial site in central New Jersey. This area was undeveloped until the mid to late 1800s when Trenton underwent rapid industrialization. Trenton began to decline during the Great Depression. In the 1980s, a redevelopment plan began that aimed to preserve this historic area. Today Mill Hill is a quiet, safe enclave within the city. Street signs welcome visitors to the neighborhood "where people watch out for each other." The Old Mill Society sponsors summer garden tours, December holiday tours, and numerous other activities.

Many Mill Hill homes are attached, so visitors trooped through the houses to get to the gardens in the back. Other back yards were accessed via two foot wide, gated passages between homes. One lady allowed visitors free access to her fabulously renovated town home besides the visit to her unique back yard. Many homeowners provided bottled water, iced tea, and yummy cookies.

Many Mill Hill homes are attached, so visitors trooped through the houses to get to the gardens in the back. Other back yards were accessed via two foot wide, gated passages between homes. One lady allowed visitors free access to her fabulously renovated town home besides the visit to her unique back yard. Many homeowners provided bottled water, iced tea, and yummy cookies.
 |
| An Urban Oasis |
 |
| Several gardens on the tour had water features. One homeowner expressed appreciation for the wild life that gardens attract, even for the rat that likes to hide under her waterfall! Ah, city living. |
 |
| This method of growing herbs inspires me. |
 |
| Several homeowners incorporated bits of architecture from Trenton's past into their garden designs. |
 |
| This compass design uses left over pieces from granite counter tops. |
 |
| This gnome's abode is nestled in an enormous mass of tree roots. |
 |
| This backyard couldn't be simpler or more eye catching - colorful containers sitting on compacted earth. |
 |
| Mill Hill is for friendly people. This shared alley connects the backyards of two attached houses. The outdoor dining area made me feel like I was walking past a Parisian café. |
 |
| Another example of vertical gardening. |
 |
| This backyard features a sunken garden. |
 |
| What a grand, old home. |
 |
| This home would win a prize for having the most inviting front porch. |
 |
| This was my favorite house in Mill Hill. |
Subscribe to:
Posts (Atom)