When I started Happy in Hainesport, I designed a business card. I gave them to people who inquired about the blog. I tacked them up on community bulletin boards. I even left them in waiting rooms and on restaurant tables.
I decided that I might need other cards for other situations. How's this one?
The fiber artists of the South Jersey Crochet Guild are displaying their art in the Smithville Worker's House from now until mid-March 2020. Take advantage of the recent mild weather and go out to Historic Smithville Park. You can't beat the admission price - FREE! Smithville Park is located at 803 Smithville Road, Eastampton, New Jersey. The park is open from dawn till dust 365 days per year. The Worker's House is open from 10:00 a.m. to 4:00 p.m. from Thursday though Saturday and from 12:00 noon to 4:00 p.m. on Sunday.
Kitchen Crochet
Adding crocheted hangers to dish towels is a classic. Crocheted grocery totes (upper right corner) are so much cooler than the plastic ones that are covered with store advertising.
Cotton dish cloths work up fast and can be done in a variety of interesting stitch patterns. Check out this video for making dish scrubbies: https://youtu.be/juiwV-EjEgw
The newest member of our group made this granny square afghan. I like the way she took a traditional pattern and used color in a non-traditional way.
We dedicated one room to children's items. What toddler wouldn't like a snowman or unicorn hat? I wish I had a Minnie Mouse pocketbook back in my Mouseketeer days.
The room is filled with layette items and baby blankets.
Edwarda Speziale is the leader of our group. This afghan called "Stars and Stripes" won best in show at the 2019 Burlington County Farm Fair. One side is a star pattern and the reverse side is striped. Ingenious! This afghan, as well as other items on display, is for sale.
Warm Winter Woolies
This case displays some of the items we made for animal causes - nests for bird rehabilitation, cat blankets and toys, and dog sweaters. The stuffed llama is an advanced crochet project made by one of our most accomplished members.
A Beautiful Shawl with a Lacey Fishnet Edge
This afghan is called "Tree of Life." It is also an advanced level project.
This colorful, round medallion afghan is unique.
There are plenty more items to see, but I don't want to show you everything. Go out to Smithville and enjoy the display.
Check out these fun storage baskets. I made all the baskets with three strands of yarn using a size N crochet hook. I got my instructions from a Jayda in Stitches video which I will include at the end of this post.
This one is the biggest. The base is 96 stitches in circumference. The diameter is a bit bigger than 14 inches and it is a little taller than 15 inches. I made a crab stitch border around the top edge.
I sized this one down a bit. The base is 88 stitches in circumference. Making the basket just a little bit smaller made all the difference in the rigidity of the sides. This version stands up nicely on it's own when it is empty. Mardi likes it!
Jayda makes an 80 stitch base for the baskets in her video. I found that my 80 stitch baskets did not work up as big as the ones Jayda made. That is why I added stitches (multiples of 8) for the first two baskets shown in this post. This colorful, pastel basket is a scrap project. I used up a bag of small balls of yarn on this one.
This one is also a scrap project. I had lots of little balls of black yarn to which I added a bunch of pink shades. These baskets are a great way to use up leftover yarn. Baskets made of acrylic yarn are machine washable and machine dryable.
I found the tutorial for making these boots/slippers on YouTube on the Sirin's Crochet channel.
First, I tried to make them Sirin's way, but I thought they were too thick. I used #6 yarn as directed, but the slippers were at least 1.25 inches thick, maybe more. Since I normally wear socks plus slippers, these boots would make my feet sweat. They were also a bit big, given the bulky weight of the yarn.
I made the following changes: I used a K hook (6.5mm) for the foundation chain of 19. After making the foundation chain, I used a 6 mm (J hook) as Sirin did. I switched from #6 Lion Brand yarn to Sugar 'n' Cream 100% cotton yarn which is a thinner #4 yarn. I made the soles with three strands of yarn and the uppers with two strands of yarn. The slippers fit my size 10 tootsies. The length is good, but they are a bit wide. My slippers are a little floppier than Sirin's. I think my cotton yarn will be long wearing. I also think it will washing nicely since cotton can handle hot water and machine drying.
If you follow Sirin's video to make these slippers, you will probably have to pause the action on each step. Sirin goes fast, and I found I could not keep up with her.
I'm a big fan of "Young Sheldon." The afghans in the Cooper family living room have not gone unnoticed by this avid crocheter.
Picture from Google Images/YouTube
It turns out that lots of crochet fans are in love with this afghan on the back of Sheldon's sofa. They are calling it the Sheldon Squared Afghan. It's been pinned a jillion times on Pinterest. There are free instructions on Ravelry and the Crochet Crowd's site. You can buy ready made Sheldon Squared afghans on Etsy.
I decided to make my version and donate it to Smithville Mansion's Christmas sale. Sure enough, a fellow Sheldon fan snapped it up.
Here's my afghan:
You've got to love those late 1970s earth tone colors. I hope whoever purchased my work enjoys it for years to come.
I recently discovered that the water in the tank of one of my toilets was leaking into the bowl. How did I know this was happening? I would occasionally hear water filling the tank for a few seconds, not the length of a flush fill up, just a few seconds. To confirm that the tank was losing water, I put some green food coloring into the tank. I lifted the seat lid about an hour later to find that the bowl water was turning green. Leak confirmed.
When water leaks from tank to bowl, you need to repair or replace the flush valve. Did I perform this simple fix? No, that would be too easy. I took the tank off of the toilet and replaced every damn item inside it. I turned a ten minute job into a three day job, but now I am an expert when it comes to Kohler Wellworth toilets and the Kohler Drylock tank to bowl connection system.
This was my plumbing odyssey.
#1
Every plumbing project begins with turning off the water supply. Another little piece of advice is to have plenty of old towels on hand.
#2
Toilet Tank Guts
The fill valve brings the water into the tank filling it to the appropriate level. The flush valve raises when you depress the handle, letting 1.6 gallons of water flow down into the bowl to flush away the pees and poos. There is a $3.00 gasket in the flush valve that I could have replaced, and that probably would have solved my problem. Instead, I opted to rip it all out. All the parts cost $60.00 at US Supply: https://virtualcounter.ussupply.com/
I had to go to a plumbing supply house because Home Depot and Lowe's don't carry a full line of Kohler parts.
#3
Disconnect the tube which runs from the fill valve to the flush valve.
#4
Remove the flush lever.
#5
Twist out the flush valve by turning a quarter turn to the left and lifting it out. The black base stays for now.
#6
This picture shows the deteriorated condition of the gasket.
#7
You have to remove a set of nuts and washers under the tank on either side of the toilet. Now you can lift off the tank.
#8
I had to get the tank mounting parts off the bottom of the tank. I went out and bought an adjustable wrench that I am sure I will never use again - another $16.00. The wrench was useless. The inside (Picture #5) and outside parts were fused together. Everything spun round and round. I couldn't think of a way to hold the inside part still while I cracked loose the outside part. That's where a plumber's helper/second set of hands would have been nice.
#9
I solved the problem by employing my trusty hack saw. I sawed off the outside plastic ring. My pile of new parts contained a new ring, so there was no need to save the original.
#10
Let's talk about that Drylock tank to bowl connection I mentioned earlier. The water flows to the bowl through a hole in the center of the tank bottom. Go back up to picture #5 and look at the black flush valve base that stayed inside the tank. The threaded base goes through the hole and out the bottom of the tank. A black metal plate gets slapped on. Then a big black plastic ring gets screwed on to hold it all together. The bottom of the tank has indentations that allow you to slide the tank mounting bolts into slots in the black metal plate. There are a couple of gaskets that prevent leaking. The tank gets popped back onto the toilet base and screwed down. I was worried that I might screw it down too tightly and crack the porcelain. I made it as tight as I dared, but it seems that the tank has a teensy wobble when I push on it. So, don't push on it, right? There are no leaks, so I decided it's all good.
#11
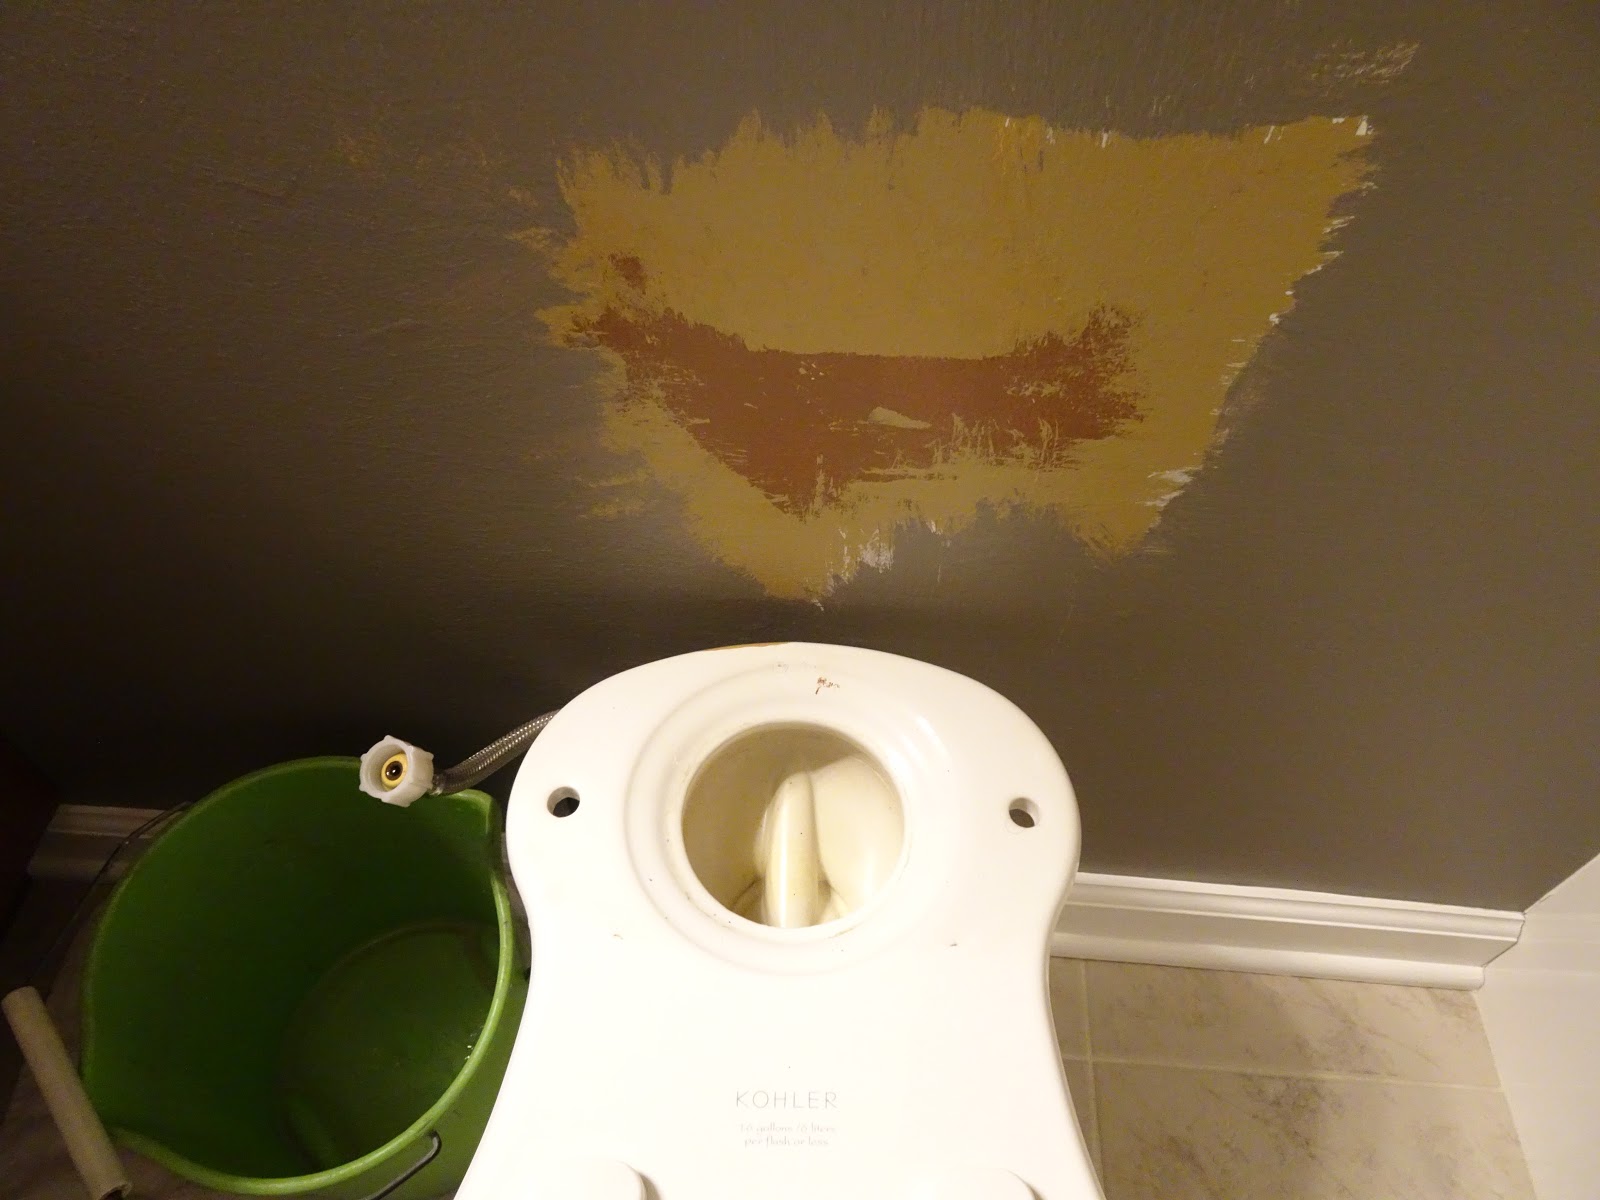
Oh, my. You can see all the colors the walls have been painted. With each new paint color I was less concerned with getting behind the toilet. Did I take this opportunity to apply some paint to the wall? Nah. Nobody sees back there.
There is a big, spongy gray gasket that goes into the hole in the base before setting the tank back on.
#12
When everything is back together, you turn the water on. When I did this, the eleven year old supply line leaked. These lines should be replaced every ten years, so it was off to the Home Depot for a new line.
#13
I paid a couple of bucks extra to get a Fluid Master line that makes a clicking sound when it is just tight enough. Amateurs like me need all the help we can get.
#14
So pretty, new, and clean inside. By the way, do you see the writing on the inside wall of the tank? You need those numbers when you go to the plumbing supply store to buy parts.
#15
The last in this series of traumatic events was the shockingly low water level after that first test flush. I added some food coloring so the water level would be obvious in the photo. I did my repairs on Saturday and Sunday, so I had to wait until Monday to call the Kohler help line. I was assured that the water level should be 6.5 inches below the rim of the bowl. The water level in my toilet was 6 inches below the rim, so I actually had a little extra water in the bowl. How do you measure the distance from the rim to the surface of the water? I set a yard stick across the rim of the bowl, then lowered a ruler into the bowl until it touched the water. The crossing point where the ruler met the yard stick showed me the distance to the water's surface.
I decided in November 2017 that I wanted to go back to my natural color. Who knew what that would be? I hadn't seen my natural color since 1993. Each time I needed a touch up, I examined the new white growth at my temples. I hoped I would be lucky enough to inherit the snow white hair from my father's side of the family.
It took almost two years to grow out L'Oreal Natural Blonde. The transition period wasn't that bad. I had the last of the blonde ends trimmed off in October 2019. I didn't end up with dad and granddad's white hair, but I kind of like this.
No matter how hard I work at it, I always look goofy in selfies.